There is nothing quite like the feeling of pulling into a beautiful new campsite after a long day of driving. However, before you can kick back in your camp chair, you must follow a crucial series of steps to guarantee your stay is safe and comfortable. Mastering the process of setting up your RV helps create a strong foundation for success. From leveling your rig to connecting your utilities, doing things in the right order prevents damage to your equipment and sets the stage for a stress-free vacation.
Surveying the Site Before Setting Up Your RV
The work actually begins before you even put the vehicle in park. As you pull into your designated spot, it is vital to get out and perform a quick ground survey. Look for low-hanging branches that could snag your roof AC units, or tear your awning. Check the ground for stability; soft sand or mud might require extra-wide jack pads to prevent your stabilizers from sinking. You also need to locate the utility pedestal and make sure your power cord and water hose will reach the connections without being stretched too thin. Another critical part of this initial phase is checking for obstacles that might interfere with your slide-outs. By taking two minutes to walk the site, you save yourself the headache of having to hitch back up and move the rig later.
Leveling and Stabilizing the Rig
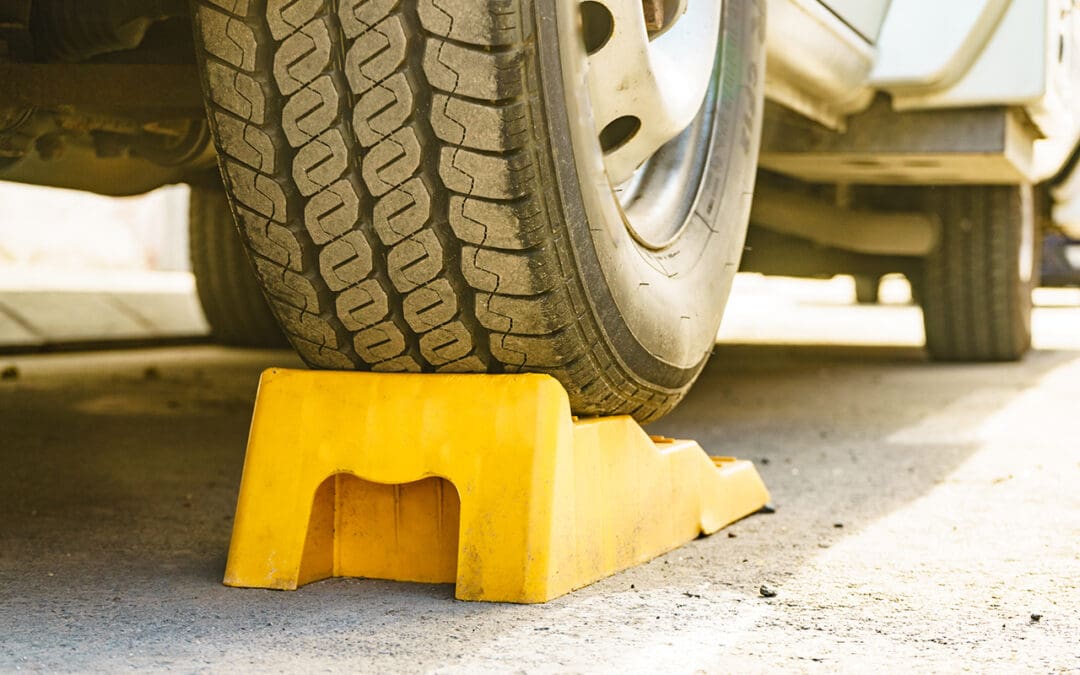
Once your RV is positioned exactly where you want it, the next priority is getting it level. Living in an unlevel RV could be dangerous for your equipment. Most RV refrigerators require the unit to be nearly perfectly level to operate correctly, as the cooling liquids need gravity to flow through the system. Use leveling blocks under the tires on the low side until your bubbles are centered. After the rig is level from side to side and front to back, it is time to deploy your stabilizers. A common mistake among newcomers is trying to use stabilizers to lift the RV. Stabilizers are designed only to stop the “rocking” motion when people walk around inside; they are not built to support the weight of the vehicle. Lower them until they make firm contact with the ground or your jack pads. This creates a solid foundation that makes the interior feel like a stationary home rather than a boat on choppy water.
Essential Utility Connections for Setting Up Your RV
With a stable and level platform, you can now move on to the utility connections. Always start with your electrical hookup. It is highly recommended to use a surge protector or an Electrical Management System (EMS) between the park pedestal and your power cord. These devices protect your sensitive onboard electronics from power surges or low voltage, which are surprisingly common in older campgrounds. Plug in the surge protector first, check for a green light or a “safe” reading, and then connect your RV.
Next, move to the water connection. Before hooking up your hose, always attach a water pressure regulator to the park faucet. Campground water pressure can fluctuate wildly and is often high enough to burst the plastic plumbing lines inside your RV. Once the regulator is in place, connect your fresh water hose. Finally, if you have a sewer hookup, connect your waste hose, ensuring there is a steady slope from the RV to the drain. Keep your black tank valve closed until the tank is at least two-thirds full to ensure proper drainage when it is time to pack up.
Opening Slides and Finishing the Interior
The final stage of setting up your RV involves expanding your living space and making it feel like home. Before you hit the button to extend your slide-outs, do one final interior check. Make sure no cabinet doors have swung open during transit and that there are no loose items on the floor that could get caught in the slide mechanism. Once the coast is clear, extend the slides fully until you hear the motor pitch change or the system clicks, depending on your specific model. Once the walls are out, you can focus on the small comforts. Turn on your water heater, set your climate control, and unpack your outdoor gear. By following this consistent routine every time you arrive, you guarantee that your rig is properly cared for and that you are ready to enjoy the lifestyle you worked so hard to achieve.
Frequently Asked Questions (FAQs)
How long should it take to set up an RV at a campsite?
For most experienced RVers, the entire process takes between thirty and forty-five minutes. However, if you are a beginner, it is better to take your time and follow a checklist.
Can I leave my slide-outs in if I’m just staying for one night?
Absolutely. If you have access to everything you need (like the bed and bathroom) with the slides in, staying “tucked in” can save you time.
Why is a water pressure regulator so important when setting up your RV?
Most RV plumbing is rated for about 40-50 PSI. Some campgrounds have pressure exceeding 80 or 100 PSI, which could cause your interior fittings to spray or leak behind your walls, leading to hidden mold and water damage.
Should I always use jack pads under my stabilizers?
It is a good habit to get into. Jack pads provide a wider footprint, preventing sinking into soft ground and protecting the campsite asphalt from damage caused by the metal feet of your stabilizers.
Is it better to level the RV with the slides in or out?
You should always level your RV with the slides in.
Gneiss Goods provides RV inspections to customers in San Antonio, TX, and the surrounding areas. Contact us to request our services.
Recent Comments